Tech Update No. 06


When It Rains; It Pours
On-Location_Distillery_rain

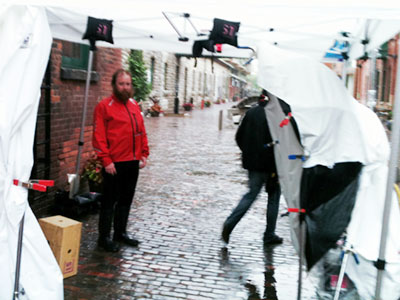
After a rather dry Spring – for both work and weather – the Summer shooting season hit like a hurricane—almost literally.

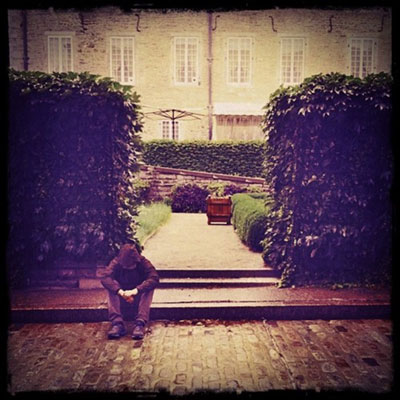
The past few weeks have seen me on crews that have had to deal with precipitation on the cobblestone streets of both Toronto (above) and Montreal (below). Yet, despite their challenges, these shoots yielded great results.

Just goes to show that with the right team, lots of clear plastic garbage bags and some determination, even a torrential downpour is no reason to call the shoot.
Montreal-Rain

Cheers,
Eric


Tech Tip

Bring It All Together:
Smart Albums vs. Selects Folders

Smart_Albums_0

When I first started doing digital capture I made a lot of folders. I remember when each individual shot used to get it’s own capture, selects and output folder. (I do not miss those days.)

Then we started using one master selects or “Move To” folder to separate desired files from the general captures. This was an improvement but if a shot had multiple selects or supporting captures such as background plates and bracketed exposures, the Selects Folder could quickly become cluttered and no longer provide a quick overview of the shoot’s progress.

Increasingly the trend is towards keeping all the captures in their individual shot folders. This helps with file management and makes it easier for retouchers since all of a shot’s captures are in one location. However, photographers, art directors and clients still want to be able to compare shots and see their selects quickly while on-set. This is where Capture One’s Smart Albums are invaluable.

Capture One’s Smart Albums allow you to set search parameters based on a wide variety of variables including a capture’s Star Rating and Colour Tag. Once created these Smart Albums continuously ‘watch’ the folders in the Session Favourites and automatically add captures to the album that match their search criteria. It’s important to note that these Smart Albums DO NOT MOVE the captures from their original capture folders. They simply create an ‘alias’ that references the capture without moving or copying it.

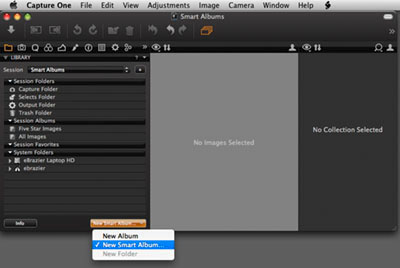
Here are the steps to create your own Smart Album:
Smart_Albums_1
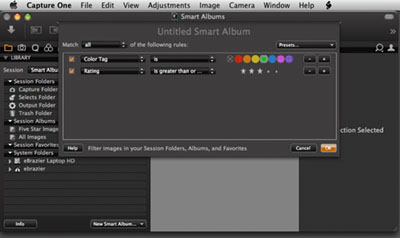
STEP 1 – Open a session in Capture One. At the bottom of the Library Tool Tab click and hold the “New Album” button and select “New Smart Album…” from the menu.

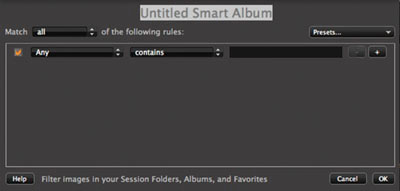
The Smart Album dialogue will appear.
STEP 2 – The Smart Album dialogue will appear.

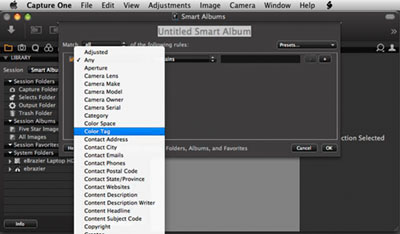
STEP 3 - From the drop-down menu select the first parameter you want to search for. In this case it's "Colour Tag".
STEP 3 – From the drop-down menu select the first parameter you want to search for. In this case it’s “Colour Tag”.

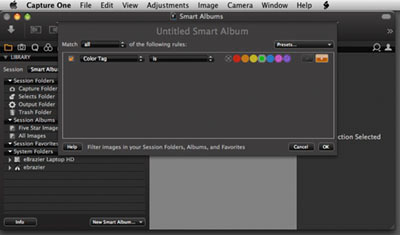
STEP 4 - In the second drop-down menu you can select to search for images that "IS" or "IS NOT" tagged with the selected colour tag. If you want to add another search parameter click the + button on the far right of the dialogue.
STEP 4 – In the second drop-down menu you can select to search for images that “IS” or “IS NOT” tagged with the selected colour tag. If you want to add another search parameter click the + button on the far right of the dialogue.

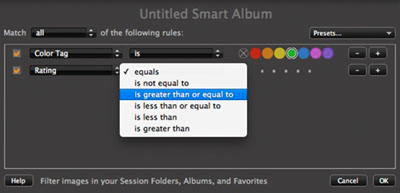
STEP 5 - Adding a second parameter such as "Rating" provides increasingly specific search options.
STEP 5 – Adding a second parameter such as “Rating” provides increasingly specific search options.

STEP 6 - You can continue to add search parameters such as Creation Date, Processed State, Aperture, etc... but if you are done click "OK".
STEP 6 – You can continue to add search parameters such as Creation Date, Processed State, Aperture, etc… but if you are done click “OK”.

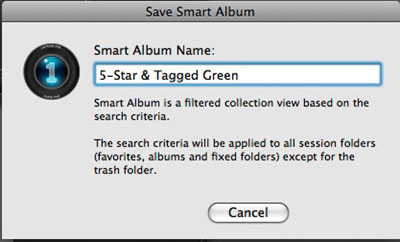
STEP 7 - A dialogue will appear and ask you to name the Smart Album. I would suggest being very descriptive in your naming so it is clear what type of images the album's search is returning.
STEP 7 – A dialogue will appear and ask you to name the Smart Album. I would suggest being very descriptive in your naming so it is clear what type of images the album’s search is returning.

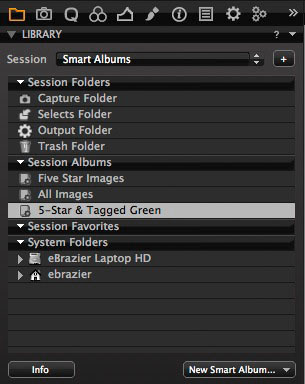
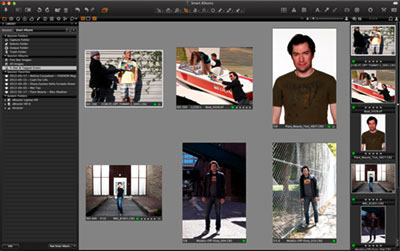
STEP 8 - The new Smart Album will appear in the Albums section of Session Library. Selecting this particular album will display images from the Session Folders and Session Favourites that are rated 5 stars AND have a green colour tag.
STEP 8 – The new Smart Album will appear in the Albums section of Session Library. Selecting this particular album will display images from the Session Folders and Session Favourites that are rated 5 stars AND have a green colour tag.
NOTE: Non-Session Folders (i.e. user created folders) MUST be added to the Session Favourites in order for them to be searched by Smart Albums. Folders can be manually added to the favourites list by right-clicking its icon in the Session Library and selecting ‘Add to Favourites’.